

Why Do Leather Belts Crack? Causes, Fixes & Prevention
Table of Contents
- Why Do Leather Belts Crack? The Forces Behind the Damage
- Surface Cracks vs Cracks Through the Leather: A Diagnostic Guide
- Why Leather Belts Crack at the Holes
- Leather Quality and Material Construction: Full-Grain vs Genuine vs Bonded
- How to Prevent Leather Belt from Cracking
- How to Condition a Leather Belt (and What to Avoid)
- How to Repair a Cracked Leather Belt by Damage Severity
- Frequently Asked Questions
Last Updated: October 7, 2026
Why Do Leather Belts Crack? The Forces Behind the Damage
Leather belts crack when the fibers inside the hide lose moisture and can no longer stretch. Dry leather turns stiff.
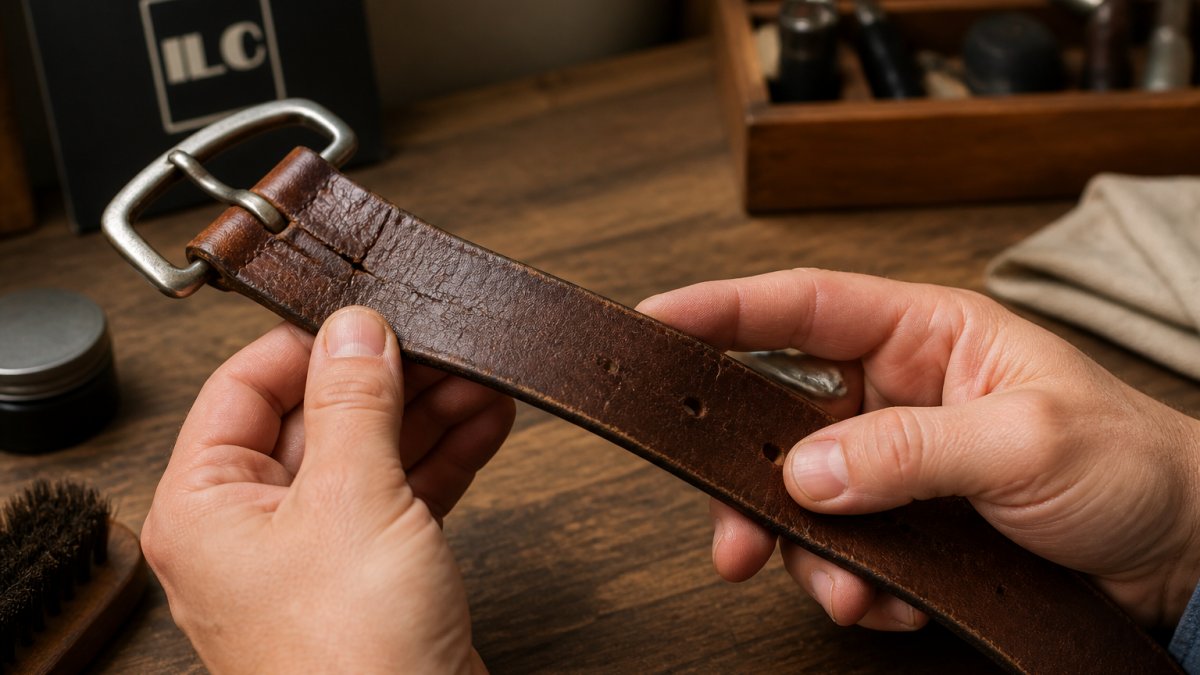
This guide from I Look Classy covers why leather belts crack, how to tell surface damage from real tears, and how to prevent it.
Leather is skin. It needs some moisture to stay flexible. When that moisture goes, the fibers dry out and lose their stretch.
Here are the main forces behind cracking:
- Loss of moisture and flexibility
- Repeated bending at the same spots
- Heat, sunlight, and sweat
Dryness and Loss of Flexibility
Dry leather is the number one reason belts crack. When the natural oils dry up, the fibers stiffen and the belt can't flex with your body. Belts often sit in a closet for months between wears, letting moisture escape, and dry winter air speeds this up. The fix: condition your belt before it feels stiff.
Repeated Bending at the Buckle and Belt Holes
Every time you put on a belt, it bends at the same two places: the buckle fold and the hole you use most. Repeated bending weakens the fibers there, and over time a crease turns into a crack. Belt holes take extra stress because the prong pushes and pulls each time you fasten it.
Environmental and Use-Related Causes
Heat, sunlight, and sweat all speed up cracking. Sweat is acidic and breaks down the finish, while sunlight and heat from a dashboard or radiator dry the leather out. Storage matters too: a belt hung on a nail or coiled tight in a drawer bends in ways it wasn't meant to.
Surface Cracks vs Cracks Through the Leather: A Diagnostic Guide
Not every crack is the same, and the wrong remedy makes things worse. A finish crack on a coated belt can be conditioned back to health. A structural crack through the hide cannot.
Step 1: The Bend Test
Hold the belt on either side of the suspect area and bend it into a gentle U, the way it curves around your waist.
- If the line stays closed and the leather flexes smoothly, the damage is in the finish or the top grain. This is a surface crack.
- If the line opens into a visible gap, the fibers underneath have separated. This is a structural crack.
- If the leather feels stiff and resists the bend before the crack even opens, dryness has progressed past the point where conditioning alone will restore flexibility.
A structural crack that opens under a normal bend will eventually tear all the way through. No conditioner, wax, or filler reverses that.
Step 2: The Magnification Check
Use your phone's camera zoom or a cheap jeweler's loupe. Look at the crack edges.
- Surface crack: The edges are sharp and sit on top of the leather. You can see the grain pattern continuing underneath.
- Structural crack: The edges are ragged and the interior looks fibrous, like torn felt. The grain pattern stops at the crack.
- Delamination: You see two distinct layers, a thin top sheet lifting away from a fuzzy or fabric-like backing. This is the signature of bonded or heavily coated leather, and it is not repairable.
Step 3: The Crease-and-Release Test
Pinch the leather across the crack and release, then pinch a healthy area a few inches away.
- If the cracked area creases sharply and stays creased while the healthy area springs back, the collagen structure at the crack has broken down.
- If both areas behave the same way, the leather is uniformly dry but not yet structurally failed. Conditioning can still help.
Step 4: The Edge and Hole Check
Cracks rarely appear alone. Look at the belt edges and the hole you use most.
- Fraying or splitting edges point to a split or low-grade hide that is failing from the inside out.
- Elongated or torn holes mean the prong has already pulled fibers apart. Cracks radiating from a hole are almost always structural.
- A white, chalky residue on the surface is often bloom, fats that have migrated out of the leather. Bloom is cosmetic and buffs away. Do not confuse it with mold, which is fuzzy, dark, and smells musty.
What Each Result Means
| What You Found | Diagnosis | Realistic Outcome |
|---|---|---|
| Lines stay closed, grain intact underneath | Surface or finish crack | Improves with cleaning and conditioning |
| Crack opens on a gentle bend, fibrous interior | Structural crack | Cannot be repaired; replace or retire the belt |
| Top layer lifting from a fuzzy backing | Delamination (bonded or coated leather) | Not repairable |
| Uniform stiffness, no open cracks yet | Dryness | Recoverable with conditioning |
| Cracks radiating from an elongated hole | Structural failure at a stress point | Replace; the hole will tear through |
Why Leather Belts Crack at the Holes
Belts crack at the holes because that's where the stress is highest. The prong presses into the leather every time you fasten the belt, and that pressure, repeated hundreds of times, wears the fibers down. The hole you use most gets the worst of it: the leather stretches, the edges deform, and small cracks spread outward. This is why holeless belt designs last longer, a ratchet or automatic buckle spreads the pressure across a track instead of one hole.

Leather Quality and Material Construction: Full-Grain vs Genuine vs Bonded
Leather quality decides how long a belt lasts. The three main types behave very differently when it comes to cracking.
Full-grain leather is the top layer of the hide, fibers intact.
Genuine leather is a broad term. It can mean a split layer with a finish on top.
Bonded leather is made from scraps glued together and coated. It peels and flakes rather than cracking.
| Leather Type | What It Is | How It Fails | Lifespan |
|---|---|---|---|
| Full-grain | Top layer, full fibers | Cracks if neglected | Longest |
| Genuine | Split layer, finished top | Surface cracks, peeling | Medium |
| Bonded | Scraps glued and coated | Peeling, flaking | Shortest |
How Tanning, Dyeing, and Sealing Affect Durability
Tanning turns raw hide into leather. How it's done affects how the belt ages. Vegetable-tanned leather tends to stay firm and age well.
ILC Top-Grain Leather Ratchet Belt →
Dyeing and sealing add a top layer that can crack before the leather underneath does.
Thicker leather resists cracking better than thin leather. A belt around 3.5 cm wide with a solid hide holds its shape and takes daily wear without splitting.
How to Prevent Leather Belt from Cracking
You can prevent most cracking with a simple routine that keeps the leather supple and avoids the stress points that cause splits:
- Condition every 3-6 months. More often in dry climates or if you wear the belt daily.
- Rotate your belts. Give each one a day or two of rest between wears.
- Wipe off sweat. A dry cloth after a long day stops acid from sitting on the leather.
- Store flat or rolled. Hang on a wide hanger or roll loosely. Never fold tight.
- Keep it out of heat. No dashboards, radiators, or direct sun.
- Avoid soaking. Water strips the oils. If it gets wet, let it air dry away from heat.
How to Condition a Leather Belt (and What to Avoid)
Conditioning replaces the oils and fats that migrate out of leather over time. Done right, it restores flexibility and slows cracking. Done wrong, it darkens the finish, weakens stitching, or leaves a greasy film that attracts dirt.
Pick the Right Product for Your Belt
- Finished or dress belts (chrome-tanned, coated, or pigmented): Use a cream or lotion conditioner labeled for finished leather. These absorb without stripping the top coat.
- Vegetable-tanned or natural leather: A light application of a quality leather balm works well. Neatsfoot oil is traditional but easy to overdo, see the cautions below.
- Bonded or heavily coated leather: Skip conditioning altogether. The plastic top layer blocks absorption, and any product you apply just sits on the surface and attracts grime.
If you're unsure what you have, test on the back of the belt near the buckle, where any darkening won't show.
Step-by-Step Application
- Wipe first. Use a dry microfiber cloth to remove dust, sweat residue, and grit. Conditioning over dirt pushes it into the grain.
- Dispense a small amount. A dollop about the size of a dime is enough for a full belt. You can always add more; you cannot easily remove excess.
- Apply with a soft cloth, not your fingers. Fingers deposit oils unevenly and can leave salt from your skin.
- Work in small circles. Cover the front, the back, and the edges. Edges dry out first and crack first.
- Let it absorb for 15 to 20 minutes. The leather should look slightly damp, not wet. If it still looks wet after 20 minutes, you used too much.
- Buff off the excess. Use a clean, dry cloth. The belt should feel supple, not slick.
- Let it rest before wearing. Give it at least an hour, ideally overnight, so the oils settle into the fibers rather than transferring to your clothes.
How Much Is Too Much
Over-conditioning is more common than under-conditioning and causes its own problems. Watch for these signs:
- The leather feels tacky or greasy hours after buffing
- The belt has darkened noticeably and unevenly
- The surface looks shiny in patches
If you see these, stop conditioning. Wipe the belt with a dry cloth and let it rest for a week. In severe cases, a cloth barely dampened with distilled water can lift excess product, but do this sparingly, water strips oils too.
What to Avoid
- Harsh soaps and detergents. They strip the fats that keep leather flexible.
- Alcohol-based cleaners and hand sanitizer. They evaporate fast and pull moisture out of the hide.
- Heavy neatsfoot oil on stitched belts. In large amounts it can soften and weaken the thread over time.
How Often to Condition
There is no single correct interval, it depends on wear frequency and climate.
- Daily-wear belt in a dry climate or heated indoor air: Every 6 to 8 weeks.
- Daily-wear belt in a humid climate: Every 3 to 4 months.
- Occasional-wear belt (once or twice a week): Every 6 months.
The feel test beats the calendar. Once a month, flex the belt in your hands. If it bends easily and springs back, it's fine. If it feels stiff or creaks, condition it that week.
How to Repair a Cracked Leather Belt by Damage Severity
Repair depends on how deep the crack goes. Light damage you can fix at home.
| Damage Level | What You See | What to Do |
|---|---|---|
| Light | Fine surface lines, no opening | Condition and buff |
| Moderate | Small cracks at holes or fold | Condition, use leather filler, seal |
| Severe | Crack opens when bent | Replace the belt |
Light damage: Clean and condition the belt. This won't erase the lines, but it stops them from getting worse.
Moderate damage: Use a leather filler or repair cream on the crack.
Severe damage: A crack that opens when you bend the belt means the fibers are split.
For a belt that's reached the end, a new one is the smarter buy. I Look Classy's top-grain leather ratchet belt uses a holeless design that spreads pressure across a track, so there's no single stress point at the holes, where most belts fail first.

Frequently Asked Questions
Why do leather belts crack around the holes?
Belt holes are punched through the leather, cutting fibers and leaving raw edges. Each time you fasten the belt, the prong presses against the hole edges, and the leather stretches and compresses at that spot. Over time, this repeated stress, combined with dryness, causes the leather to crack at the holes. Belts with a ratchet or automatic buckle system avoid this because they have no visible holes, spreading stress evenly along a hidden track.
Can a cracked leather belt be repaired?
It depends on the depth of the crack. Surface cracks in the finish can often be improved with leather conditioner and a matching cream polish. Cracks that go through the leather cannot be fully repaired, but you can slow further damage with a flexible leather filler or patch. If the crack is deep or the belt is tearing, replacement is the safest option, especially for daily wear.
How often should you condition a leather belt?
Condition your leather belt every three to six months, or more often if you wear it daily in dry or hot climates. A simple rule: if the leather feels stiff or looks dull, it needs conditioning. Use a small amount of leather conditioner, rub it in with a soft cloth, and let it absorb. Over-conditioning can make leather too soft, so stick to a schedule based on feel and climate.
How can you tell if a leather belt is genuine leather or bonded leather?
Genuine leather is a broad term that can include lower layers, while bonded leather is made from leather scraps glued together and often peels or cracks quickly. To check, look at the edge: full-grain and top-grain leather show a solid, tight fiber structure, while bonded leather may look like a thin surface layer over a backing. Also, bend the belt; genuine leather creases naturally, while bonded leather may crack or separate at the fold.
Leather belts crack because dryness and repeated bending wear down the fibers over time. You can slow that down with regular conditioning and smart storage, but once a crack goes through the hide, the belt is done. If you're ready for a belt built to handle daily wear without cracking at the holes, I Look Classy offers top-grain leather belts with a 30-day return policy and fast shipping from the USA. Shop All and find a belt that keeps its shape for years.